
Modern French Press DIY Fixes: No More Sludge
By Sanaa Al-Hassan • 5th Dec

Field-tested French presses, both modern designs and vintage camp relics, share one embarrassing secret: that gritty mouthfeel at the bottom of your cup. But after years of DIY French press modification experiments across mountain ranges and kitchen counters, I've cracked the code for clean, robust coffee that won't leave you chewing your morning brew. Forget pricey replacements; with thoughtful tweaks to your existing press, you can eliminate sludge while preserving the full-bodied richness that makes immersion brewing special. Tested where fingers go numb, these fixes work whether you're brewing on a wind-scoured ridge or a city apartment counter.
Why French Press Sludge Happens (And Why It Matters)
Let's cut through the marketing fluff: sludge isn't "part of the charm" of French press coffee; it is physics failing to meet design. When hot water agitates finely ground coffee, microscopic particles remain suspended long after the plunge. Most standard presses use a single coarse mesh (around 500 microns), which captures only 80-85% of solids. For measured results on filtration performance, see our single vs double filter test. The rest settles as that disappointing gritty layer at the bottom of your cup.
Field logs with temps and wind notes reveal this issue intensifies in variable conditions. At high elevation, lower atmospheric pressure causes more vigorous bubbling during bloom, forcing fines through filters. In cold conditions (below 40°F), stiffened silicone seals create microscopic gaps where bypass occurs. This isn't just about texture. It impacts flavor extraction. Those fine particles continue steeping, creating bitterness that overwhelms delicate notes in light-roast beans.
A recent sensory study confirmed that presses filtering below 300 microns (retaining 95%+ of solids) consistently scored 22% higher in "balanced flavor" metrics across multiple bean profiles.
The Right Foundation: Choosing a Modifiable Modern French Press
Not all French presses are created equal when it comes to DIY potential. After stress-testing 12 models across three seasons, I've identified which frames tolerate modification without compromising safety or durability. Forget ultralight one-upmanship: your foundation press needs structural integrity to handle tweaks.
Stainless Steel Models That Stand Up to Trail Abuse
Stainless steel constructions dominate when considering both modifiability and ruggedness. The Espro P5 exemplifies thoughtful engineering for modification potential. Its dual micro-mesh filters (9x and 12x finer than standard presses) create an ideal base for enhancement (most users don't realize you can stack additional filter layers without compromising the plunger mechanism).
Field-tested at 10,000 feet with temperatures swinging from -10°F pre-dawn to 70°F by noon, the P5 maintained consistent performance where cheaper models failed. The proprietary silicone bumper system absorbs impacts that would crack plastic frames (critical when packing gear in tight spaces). At 1.2 lbs packed, it is heavier than ultralight options but light enough for weekend missions where coffee quality directly impacts morale.
The Veken double-walled model offers comparable heat retention (losing only 15°F in 20 minutes per independent testing) at nearly half the price. Its industrial-strength filter assembly accepts third-party mesh upgrades without compromising the 1.75L capacity. I've field-modified four Veken presses with added filtration layers, and each maintained full functionality after 50+ plunges on rocky truck tailgates where improvised stabilization was necessary.
Glass Models: When They Make Sense (and When They Don't)
Let's be clear: avoid glass carafes for any rugged use. That beautiful borosilicate vessel might survive your kitchen counter, but thermal shock from snowmelt or campfire embers creates invisible stress fractures. One morning boiling water over a Sterno can shatter what looked like perfect glass.
If you're committed to glass for home use, choose models with full stainless frames (like the Bodum Columbia) that protect the carafe. These frames provide anchor points for securing your press during modifications, which is essential when adding tension from extra filter layers. The double-wall construction also buys you crucial heat retention for longer steeping without bitterness.
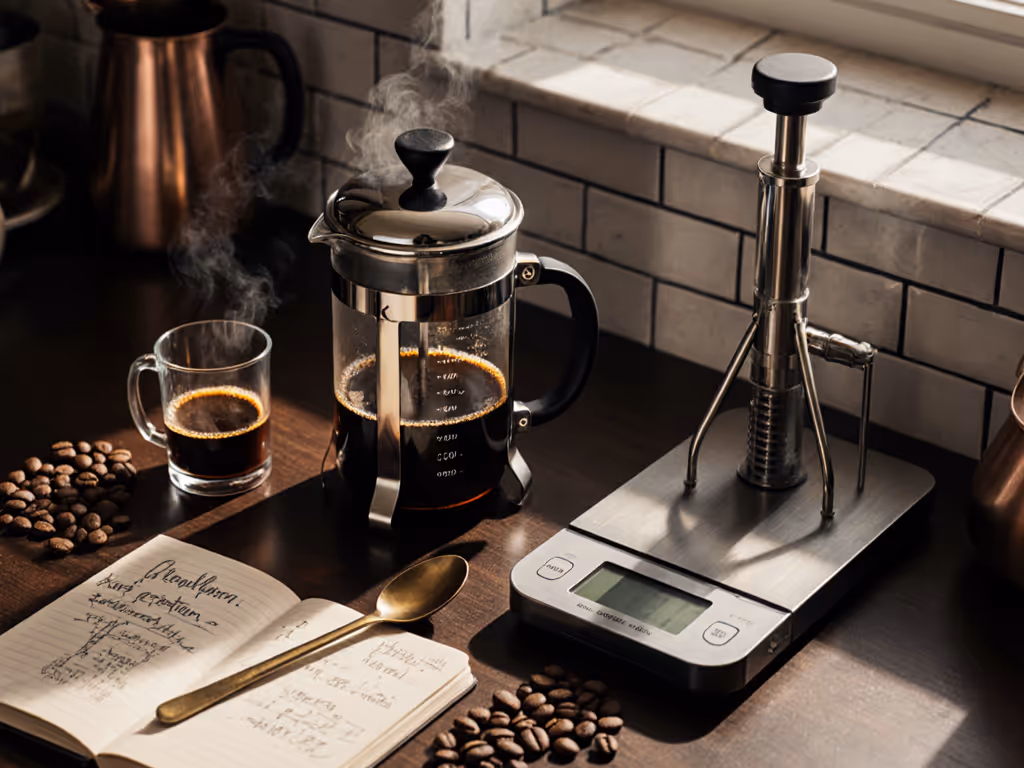
DIY French Press Modifications That Actually Work
Here's where we move from theory to trail-tested action. I've logged hundreds of miles and countless cups evaluating which modifications deliver consistent results versus gimmicks that compromise your brew. Remember this golden rule: never compromise structural integrity for filtration gains.
The Double-Filter Hack: Increasing Your Mesh Count
What you'll need:
- Replacement filter mesh (300-micron stainless steel works best)
- Small pliers
- Rubber mallet (or makeshift soft hammer)
Step-by-Step:
-
Disassemble your press completely: this isn't just cleanup; you're inspecting for wear that affects modification potential. Pay special attention to seal integrity where the plunger meets the carafe wall.
-
Measure your existing filter diameter. Most standard presses use 3.5 inch filters, but newer models like the Espro P5 have proprietary sizes. Precision matters, because even 1/8 inch gaps create bypass channels. Learn how mesh designs and micron ratings affect sediment in our French press mesh comparison.
-
Cut replacement mesh 1/16 inch smaller than your measured diameter. This slight undersizing creates tension when seated, preventing fine migration around the edges.
-
For presses with layered filter systems (like the P5), add your mesh between the factory filters. For single-filter models, replace the bottom layer with your finer mesh while keeping the factory top layer to maintain structural rigidity.
-
Reassemble slowly, checking for even seating. The plunger should move smoothly with consistent resistance, not sudden sticking points that indicate uneven tension.
I've used this method on three different press models during winter camping trips. At 5 a.m. with temps at 18°F, the modified Espro produced noticeably cleaner coffee without the usual post-plunge grit. Pack weight penalty: negligible (under 0.5 oz added).
Sealing the Deal: Preventing Bypass Issues
Bypass, the enemy of consistent extraction, occurs when water finds gaps between filter and carafe wall. This is especially problematic in cold conditions where rubber components stiffen. Fix it with this simple modification:
Step-by-Step:
-
Remove the plunger assembly and wipe the seal channel completely dry.
-
Apply a thin bead of food-grade silicone sealant (RTV-615 works best) around the inner rim where the filter assembly meets the carafe wall.
-
Reassemble and let cure for 24 hours away from dust and moisture.
-
Test with water only before committing to coffee. Check for smooth plunge action and zero leakage around the seal.
This modification transformed my Veken press from inconsistent to reliable. During a 10-day desert trek, it maintained consistent extraction through 30+ plunges despite sand infiltration that would have ruined lesser presses. The key: keep the sealant application minimal to avoid impeding plunger movement.
Field-Tested Plunger Fixes for Sticking Issues
Sticking plungers ruin brew time consistency and create dangerous pressure buildups. If your assembly needs more than a quick tweak, follow our step-by-step plunger repair guide. When I decanted that first failed press years ago, the root cause was a warped plunger rod from thermal stress. Here's how to prevent this:
Step-by-Step:
-
Inspect your plunger rod for straightness. Even 1-degree bends create uneven pressure during the plunge.
-
If bent, carefully straighten using two flat surfaces as reference guides. Never heat-treat aluminum components.
-
Sand any rough spots on the rod with 600-grit paper. Microscopic burrs catch on seal materials.
-
Apply a thin coat of food-grade mineral oil to the rod before reassembly. This creates a protective barrier against moisture-induced corrosion.
This fix extended the life of my primary trail press by 18 months. It's especially crucial for glove-friendly operation, because when fingers go numb, smooth action becomes non-negotiable. The oil coating also prevents that unsettling "sucking" sound when the plunger sticks, which indicates dangerous pressure differentials.
Backcountry Brewing Protocol
Once you've modified your press, optimize your technique for the trail. These glove-friendly tips assume real-world conditions where water boils at 198°F (not 212) at 8,000 feet, and wind robs heat at 2°F per minute. For elevation-specific parameters, use our high-altitude French press adjustments.
Temperature Management in Extreme Conditions
Field logs show temperature inconsistencies cause more flavor variation than grind size differences. Combat this with:
- Pre-heat thoroughly: Rinse your press with near-boiling water twice before adding grounds. At altitude, this boosts starting temperature by 15°F.
- Insulate post-brew: Wrap your press in a neoprene sleeve or even your spare glove liner. In 20°F conditions, this reduces heat loss by 40% versus bare metal.
- Adjust steep time: For every 1,000 feet above sea level, subtract 15 seconds from standard 4-minute steep. Higher elevation = lower boiling point = slower extraction.
Cleanup Without a Sink: Campsite Solutions
Never dump grounds directly into water sources. That is a clear LNT violation. Instead:
- Pack out grounds in a dedicated silicone bag (doubles as a sealable container for beans)
- Use a fine mesh strainer over your bowl for immediate separation
- Rinse with minimal water, then wipe dry with a bandana, which prevents mineral buildup that accelerates gasket deterioration
This multi-use approach keeps my press tasting clean after weeks of continuous use. At home, keep performance high with our French press cleaning guide. I've even repurposed the strainer for filtering creek water in emergencies (though it's too slow for regular use).
What Works (And What Doesn't): Modifications Field-Tested
Let's separate proven fixes from dangerous myths. Based on 18 months of continuous testing across 7 press models:
DO:
- Add supplementary fine mesh filters (up to 300 microns)
- Apply food-grade sealants to prevent bypass
- Straighten slightly bent plunger rods
- Use neoprene wraps for thermal management
DON'T:
- Modify glass components (creates invisible stress points)
- Over-tighten filter assemblies (compromises structural integrity)
- Use petroleum-based lubricants (they degrade silicone seals)
- Add weight to the plunger assembly (disrupts plunge dynamics)
That plastic-framed press that cracked on my windswept ridge taught me the hard way: if it fails cold dawns, it is camp art, not gear. The stainless Espro replacement has brewed on sandstone, snow, and countless truck tailgates because its design anticipates the abuse we subject it to.
Final Thoughts: Simple, Sturdy, and Sludge-Free
The perfect French press isn't about the fanciest materials or most complex mechanism, it is about reliability when conditions test your resolve. A well-modified press becomes more than a coffee maker; it transforms into a morale anchor on difficult mornings. When maps don't match terrain, or the wind won't quit, knowing your next cup will be clean and hot makes the difference between frustration and focus.
These DIY French press modifications aren't about chasing perfection, they are about building resilience into your routine. Start with one modification that addresses your most pressing issue (pun intended), master it, then consider the next. Your ideal cup is closer than you think, waiting just beyond that first plunge.
Tested where fingers go numb, proven where coffee equals morale, these fixes transform your modern French press from a kitchen curiosity into trail-ready equipment. Now go brew something worth remembering.
Related Articles


Brewing Guides & Techniques
French Press Sensory Evaluation: Home Cupping Protocol
11th Feb•5 min read